Authentication for REST API
In many cases, a REST API needs to have authentication and access control to protect API from malicious requests. For instance, you may define whether a user needs to login and has some specific authorities to access a specific endpoint. AlchemyJ can help users enable security control on REST API via some configuration operations in AlchemyJ workbook.
Here we shall use the simple REST API generated via the REST API Sample Model to show how to add security control on a REST API. There have 4 security control cases in this recipe.
Case 1 - Session-based security with LDAP authentication
In the example, we will set the API so that it can only be accessed by authenticated users. The user authentication information is kept in a session.
We shall use the REST API created via REST API Sample Model, and add user authentication to the resource1 endpoint 'http://localhost:8080/endpointGroup/resource1'.
1. Case Preparation
1.1. Create 'MyRESTAPI' via the 'REST API Sample Model', the detail procedures can refer to Get Started section.
1.2. Click Add Definition button in AlchemyJ ribbon, select REST API Login Service to add the ##RestLoginService worksheet.
1.3. Select REST API Endpoint Security to add the ##RestEndpointSecurity worksheet.
2. Enable LDAP Authentication in ##RestLoginService worksheet
2.1. Go to ##RestLoginService worksheet
2.2. In Basic Setting section, keep the default values unchanged.
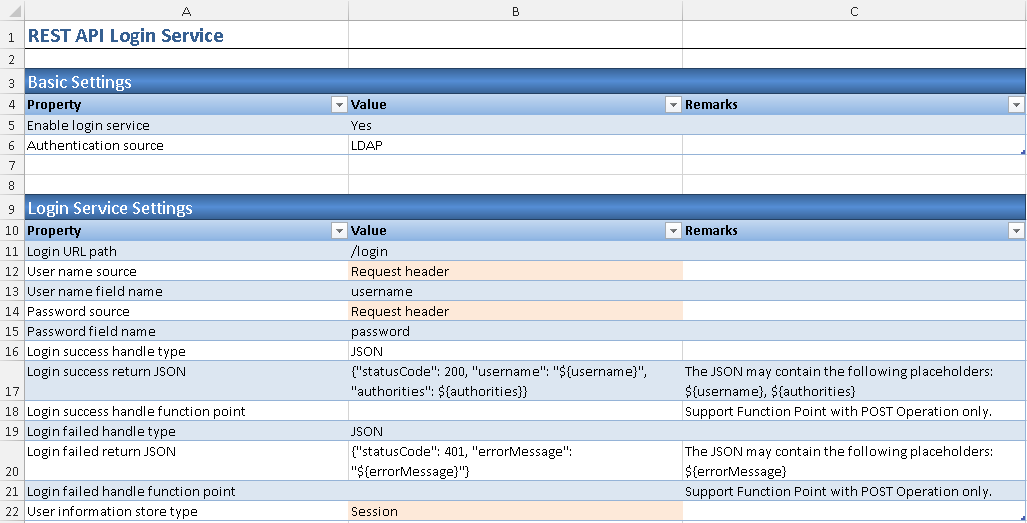
2.3. In Login Service Settings section, change User name source and Password source parameter value to Request Header, User information store type parameter value to Session.
2.4. In LDAP Authentication Setting section, fill in LDAP user-dn replacement holder parameter value as '{0}@domain.com', e.g. {0}@ABCCompany.com. Use the domain name in your environment.
3. Configure LDAP Connection Information in ##ExternalResources worksheet
3.1. Click Add Definition button in AlchemyJ ribbon, select External Resources to add the ##ExternalResources worksheet.
3.2. Expand LDAP Connection section and fill in LDAP server information that works in your environment.
4. Enable Endpoint Authentication in ##RestEndpointSecurity worksheet
4.1. Go to ##RestEndpointSecurity worksheet
4.2. In Basic Setting section, keep the default values unchanged.
4.3. In Static Access Control Configuration section, add access control for URL '/endpointGroup/resource1' and '/login' as below.
5. Generate REST API and Verify Endpoint Authentication
5.1. Click Generate API button in AlchemyJ ribbon to trigger REST API generation and execution.
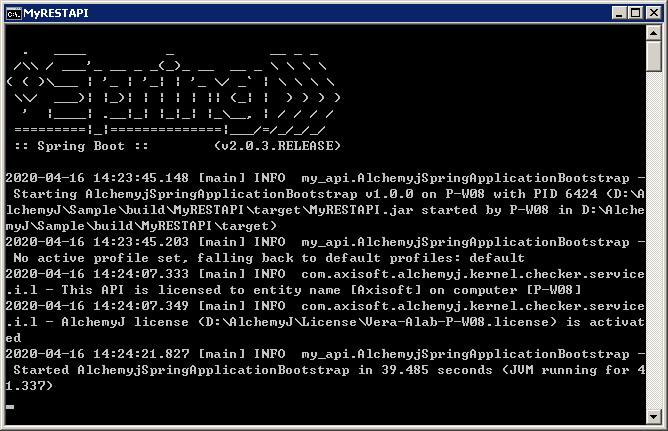
5.2. Wait until 'MyRESTAPI' is generated and started.
5.3. Let's try making the following calls using Postman to check if REST API authentication works.
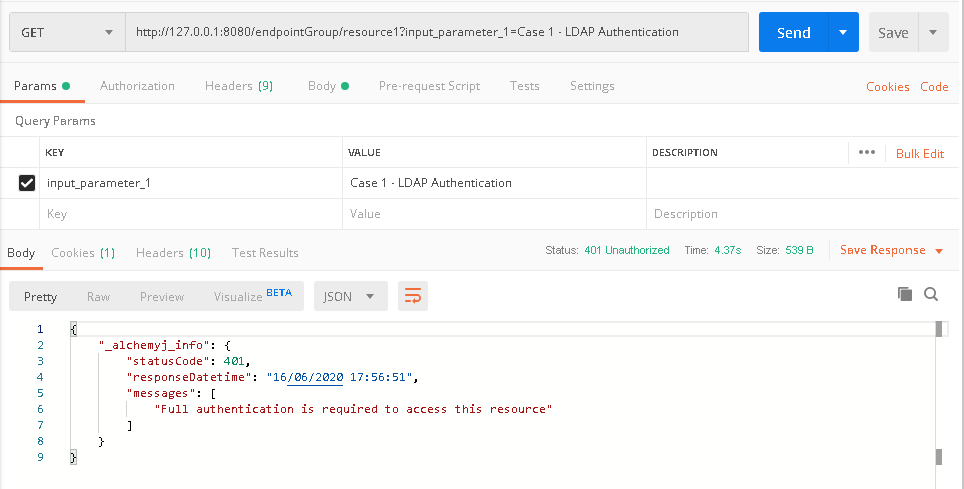
a. In Postman, create a request to call /endpointGroup/resource1. A authentication error is expected as we have not logged in yet.
b. To login the API, we need to make a request to '/login', and provide the correct user name and password in the header fields.
c. The login resource returns a successfully message. This mean we have already logged in. Now go back to '/endpointGroup/resource1' tab in Postman, click 'Send' button to send the call again, it is expected that the endpoint call would be successful and the proper result would be returned.
Case 2 - Session-based security with LDAP authentication and function entitlement
In the example, we will configure the API so that only authenticated users which has specified authority may access the API. The user authentication information will be kept in a session.
Compare this with case 1, this case has additional checks on the authority a user has. We can build this model based on the model we built in case 1.
1. Case Preparation
1.1. We will retrieve user status and the authorities a user has from a database. Thus, we need to create two tables, sec_userdetail and sec_userdetail_authority. You can pick any table names you want. The below screenshots shows the two tables we created in a MySQL database.
1.2. Fill the 'sec_userdetail' with some user records.
The possible values in the 'USERSTATUS' column are 0, 1, 2, 3.
0 - normal account which means the user account status is normal.
1 - expired account which means the user account is expired.
2 - locked account which means the user account is locked.
3 - expired token which means the user token is expired.
1.3. Insert user authority records into table 'sec_userdetail_authority'. Here, 'AM', 'BO', 'MO', 'RM' and 'SM' represents some authority names. You can use any authority name you want. Each record in the table represents one user name and authority association. One user may have multiple authorities.
1.4. Copy the AlchemyJ workbook generated in case 1 as case 2 AlchemyJ workbook.
1.5. In ##ExternalResources worksheet, configure the data source primary connection information in Data Source Configuration section. Note that the 'Password' value is encrypted via 'Tools\Encrypt Passwords' button in AlchemyJ ribbon.
1.6. Click Add Definition button in AlchemyJ ribbon, select REST API User Detail Service to add ##RestUserDetailService worksheet.
2. Enable User Detail Service in ##RestUserDetailService worksheet
2.1. Go to ##RestUserDetailService worksheet.
2.2. In Basic Settings section, keep the default values unchanged.
2.3 In Database User Management section, revise the SQL statement in User state SQL query and Authority SQL query parameter value as below.
User state SQL query
SELECT USERSTATUS as USER_STATE FROM SEC_USERDETAIL WHERE USERNAME=:USERNAME
Authority SQL query
SELECT AUTHORITY FROM SEC_USERDETAIL_AUTHORITIES WHERE USERNAME=:USERNAME
3. Configure Required Authority for Endpoint in ##RestEndpointSecurity worksheet
3.1 Go to ##RestEndpointSecurity worksheet.
3.2 In section Static Access Control Configuration, change Access Operator value to 'Has all required authority' and add 'BO' in Authority List column for the function '/endpointGroup/resource1'.
4. Generate REST API and Verify Endpoint Authentication
4.1. Click Generate API button in AlchemyJ ribbon to trigger REST API generation and execution.
4.2. Wait until 'MyRESTAPI' is generated and started.
4.3. Let's try making the following calls using Postman to check if REST API authentication works.
a. In Postman, create a request to call '/endpointGroup/resource1'. A authentication error is expected as we have not logged in yet.
b. The call failed as expected. Next, we login with user p-w07 who has no 'BO' authority and see if it can access the API. The user name and password shall be passed using header fields.
c. p-w07 has successfully login, Now go back to '/endpointGroup/resource1' tab in Postman, click 'Send' button to send the call again, it is expected that the endpoint call should still be fail because p-w07 does not have 'BO' authority expected by this endpoint.
d. The call failed with an "Access is denied" error message as expected. Now, we shall try to access the endpoint with 'p-w08' who has 'BO' authority. Go back to '/login' tab in Postman, revise the user name and password, click 'Send' button to send the call again.
e. p-w08 has successfully logged in. Go back to '/endpointGroup/resource1' tab in Postman again, click 'Send' button to send the call again, it is expected that the endpoint call should be successful.
Case 3 - JWT security with LDAP authentication
In this example, we will store the user authentication information using JSON Web Token(JWT) instead of session. We will still use the workbook created in case 1 to show the steps about how to do the REST API security authentication using token.
1. Case Preparation
1.1. Copy AlchemyJ workbook created in case 1 as case 3 AlchemyJ workbook.
1.2. Go to ##RestLoginService sheet.
1.3. In section Login Service Settings, change User information store type value from 'Session' to 'JSON web token (JWT)'.
1.4 Click Add Definition button in AlchemyJ ribbon, select REST API Token Authentication to add ##RestTokenAuthorization worksheet.
2. Configure Token Name in ##RestLoginService
2.1. Go to ##RestLoginService worksheet.
2.2. In section JSON Web Token Generation Settings, change the 'Token' parameter value from default value 'Authorization' to 'UserToken'.
3. Configure Token Name in ##RestTokenAuthorization
3.1. Go to ##RestTokenAuthorization worksheet.
3.2 In section Basic Settings, keep the default values unchanged.
3.3. In section JSON Web Token Authorization, change the 'Token name' parameter value from default value 'Authorization' to 'UserToken' or any name base on the needs.
4. Generate REST API and Verify Endpoint Authentication
4.1. Click Generate API button in AlchemyJ ribbon to trigger REST API generation and execution.
4.2. Wait until 'MyRESTAPI' is generated and started.
4.3. Let's try making following calls in Postman to check if REST API authentication with JWT works.
a. In Postman, create a request to /endpointGroup/resource1. The call should fail because the request does not contain any JWT token in the header.
b. The call failed as expected. To login and receive a JWT token, make a new request to '/login', and provide the correct domain user name and password in header fields. After authentication passed, a 'UserToken' field can be found in response 'Headers'.
c. User p-w08 logs in successfully. A JWT is returned in header field 'UserToken'. Copy the value.
d. Go back to '/endpointGroup/resource1' tab in Postman, in request 'Header', paste the copied token value in 'UserToken' field.
e. Click 'Send'. The call should be successful.
Case 4 - Database token security
For APIs that are intended for another application to call, user id and password might not be a viable option. In such case, using database token security is a solution.
In this example, we will configure the REST API so that it can be accessed via a database token which is kept in a database.
1. Case Preparation
1.1. We need a table to store the username and token mapping. Thus, create a table 'SEC_DB_TOKEN' with columns 'USERNAME' and 'TOKEN' and insert data as below.
1.2 Create 'MyRESTAPI' via the 'REST API Sample Model', refer to Get Started section for the detailed procedure.
1.3 Click Add Definition button in AlchemyJ ribbon, select REST API Token Authentication to add ##RestTokenAuthorization worksheet.
1.4 Click Add Definition button in AlchemyJ ribbon, select External Resources to add ##ExternalResources worksheet.
1.5 In ##ExternalResources worksheet, configure the data source primary connection information in Data Source Configuration section. Note that the 'Password' value is encrypted via 'Tools\Encrypt Passwords' button in AlchemyJ ribbon. Use the connection information that works in your environment.
2. Enable Endpoint Authentication in ##RestEndpointSecurity worksheet
2.1. Go to ##RestEndpointSecurity worksheet
2.2. In Basic Setting section, keep the default values unchanged.
2.3. In Static Access Control Configuration section, add access control for URL '/endpointGroup/resource1' as below.
3. Enable Token Name in ##RestTokenAuthorization
3.1. Go to ##RestTokenAuthorization worksheet.
3.2 In section Basic Settings, keep the default values unchanged.
3.3. In section JSON Web Token Authorization, change the Enable parameter value from default value 'Yes' to 'No'.
3.4. In section Database Token Authorization, change the Enable parameter value from default value 'No' to 'Yes'.
3.5 Revise the SQL statement in Checking sql parameter value as below.
Checking query
SELECT USERNAME FROM SEC_DB_TOKEN WHERE TOKEN = :TOKEN
4. Generate REST API and Verify Endpoint Authentication
4.1. Click Generate API button in AlchemyJ ribbon to trigger REST API generation and execution.
4.2. Wait until 'MyRESTAPI' is generated and started.
4.3. Let's try the following calls using Postman to check if REST API authentication works.
a. In Postman, create a request to /endpointGroup/resource1. The call should fail because no token is provided in the header fields.
b. In the Header section, create a header field Authorization2. The value should be the token key for p-w08 which we created in 'SEC_DB_TOKEN' table.
c. Click 'Send'. The call should be successful.


