Enable REST API Security
You can control who may access your REST API Endpoint Group simply by doing configurations in AlchemyJ. For instance, you may define whether a user needs to log in and has some specific authorities to access a specific endpoint. This section will show you how to set up security in AlchemyJ REST API.
Before starting
Before setting access control of a REST API, you need to have a REST API set up in AlchemyJ. We will use the sample described in Define REST API as an example here. Please follow the sample and create the REST API first.
AlchemyJ uses LDAP as an authentication service to verify the user name and password. Therefore, to use the AlchemyJ security feature, you would need to prepare some testing account in an LDAP server (for example, in Microsoft Active Directory).
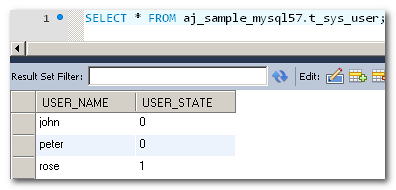
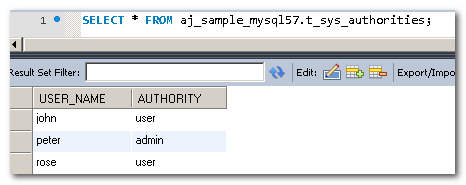
Moreover, we need a table to store user account status and another table to define the authority a user has. Please create table t_sys_user and t_sys_authorities in your database before proceeding.
Example 1 - Session-based security
In this example, we will set up session based security. Users can log in by submitting a user name and a password. If the LDAP verifies that the password is correct, the user id will be stored in the server session. For subsequent requests, the system will be able to get the logged in user id from the server session.
To enable the login service, REST API Login Service Worksheet is needed. To enable authority based access control, the REST API User Details Service Worksheet is needed. To control endpoint access, the REST API Endpoint Security Worksheet is needed. Use the Add Definition menu to add them to your workbook.
Go to the REST API Worksheet.
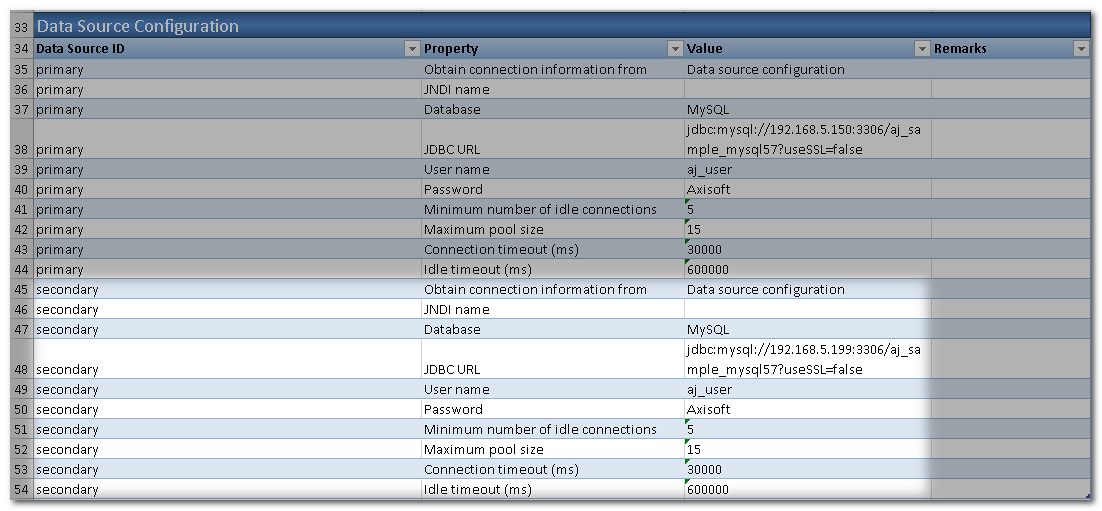
Configure the available data source. If there are some database operations of your application, the security service can share the data source with the API to use a single database for API functions and security service. If you want to use a separated database for security service or there is no database operations of the API, then you need to define an additional data source for them. In this case, we define an additional data source secondary for security service.
Fill in the LDAP server information. The LDAP server will be used for user id and password verification.
Go to the REST API Login Service Worksheet, just leave the Basic Settings keeps default values.
Next, we shall define the details of Login Service Settings. The request for login would be using POST method.

Next, define the LDAP connection to be used. Set it to primary as defined in step 4. As well as the LDAP User-Dn Replacement Holder
To make it simple, in this case the logout service is disabled.
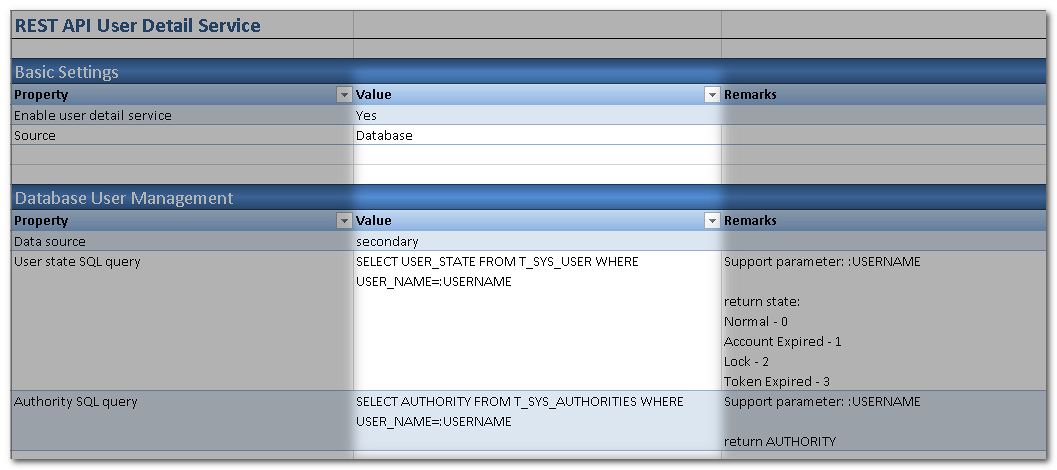
Go to the REST API User Details Service Worksheet to configure how to retrieve the user detailed information, such as the account state (normal, locked, expired, etc.) and authorities (what rights have been granted to the user).
Go to REST API Endpoint Security Worksheet to define Endpoint access control. That is, which user and with which authorities can access an endpoint. There are different ways to store these configurations. It can be defined in Excel (static access control) or in a database table (external access control). To keep this example simple, we will use the Static approach. That means End Point URL authentication rules are defined in the Excel file. To change the rules, you will have to change the definition in Excel and re-build the project.
To configure all URLs to be accessed after authentication (logged in). You can customize the controls by the HTTP Method. In this case, we apply the control for all methods.
Build the project, start up server and try to test on Postman.
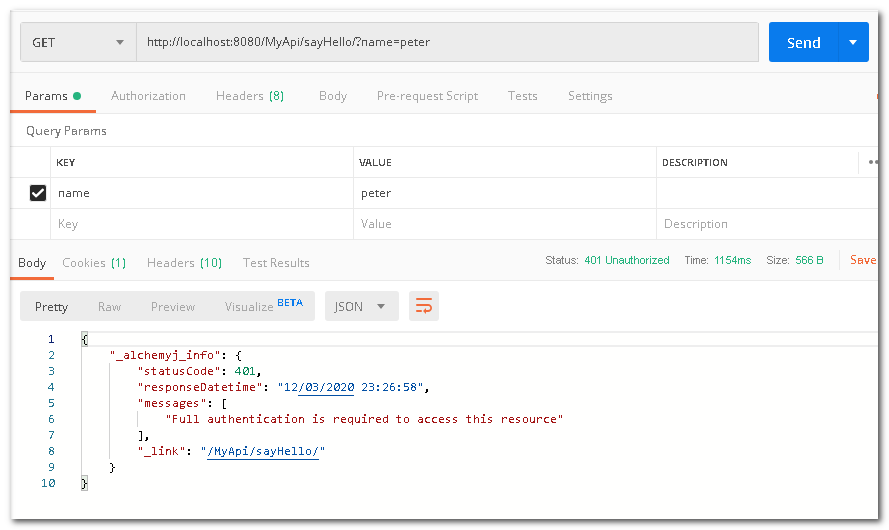
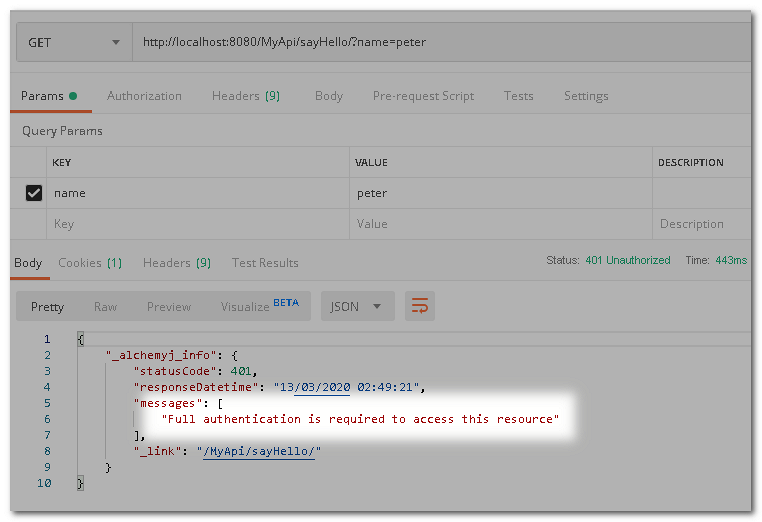
Try to access before logging in. As you can see, access has been denied.
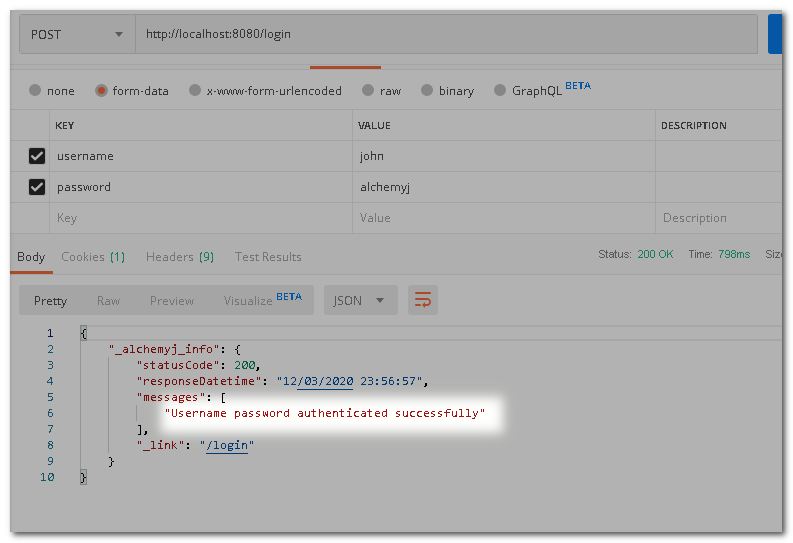
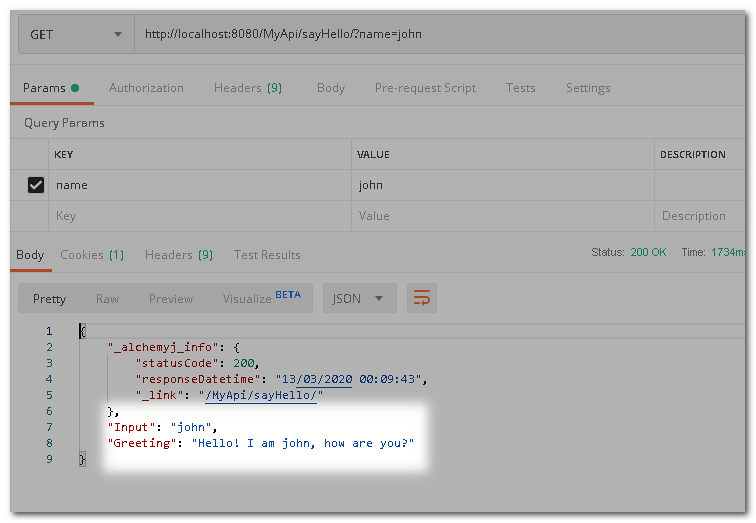
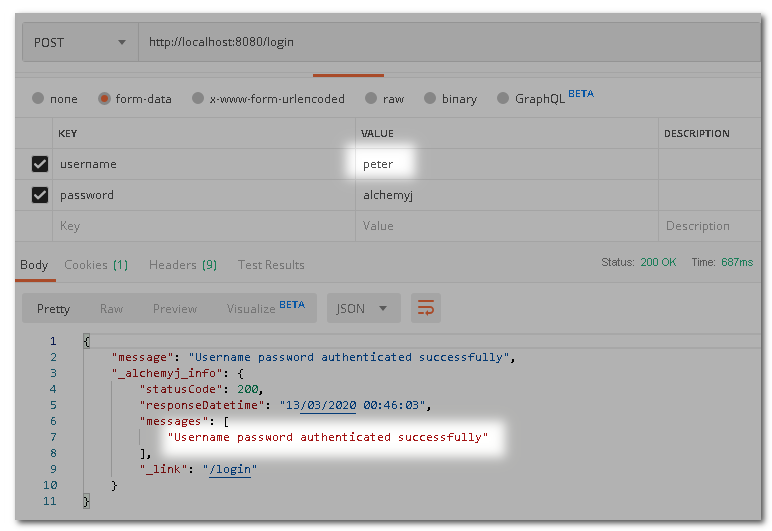
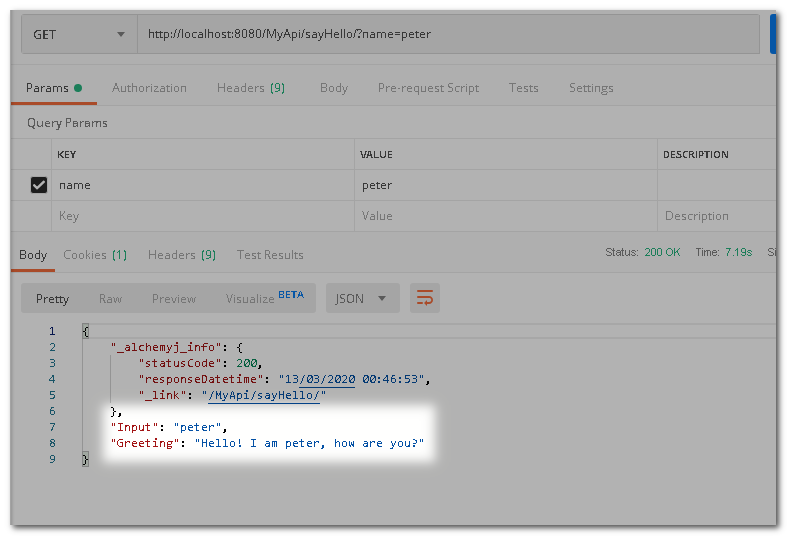
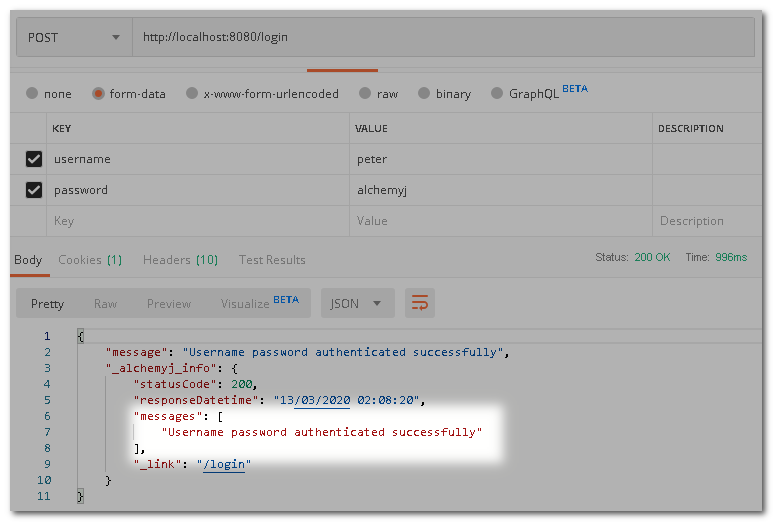
This time, log in by accessing the login endpoint first. Then call sayHello again. The proper result is returned.
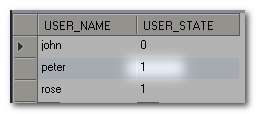
Now, let us change the Access Operator to Has any authorities and add admin to Authority List. This means that only users with admin authority shall be allowed to access the endpoint that matches the URL Pattern. In our database, only the user "peter" has such authority. Change the setting from REST API Endpoint Security Worksheet then re-build the project and test it.
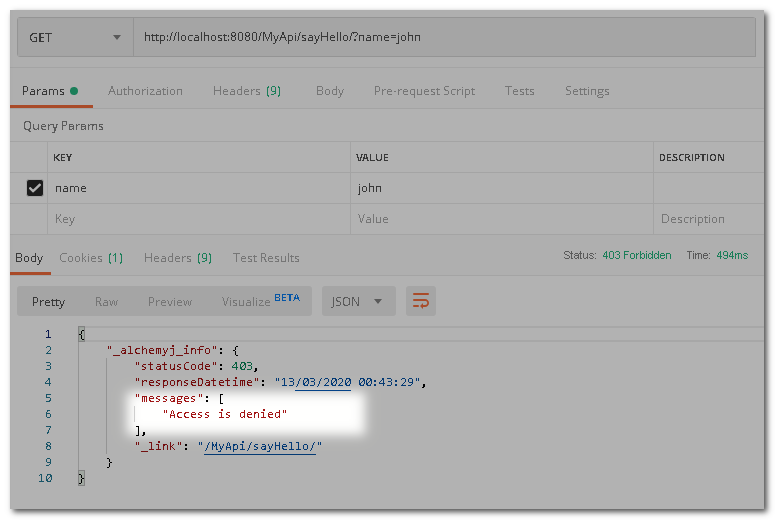
Now, if we use user "john" to login and then open the URL, access is denied as john does not have admin authority.
This time round if we log in as "peter", access is granted.
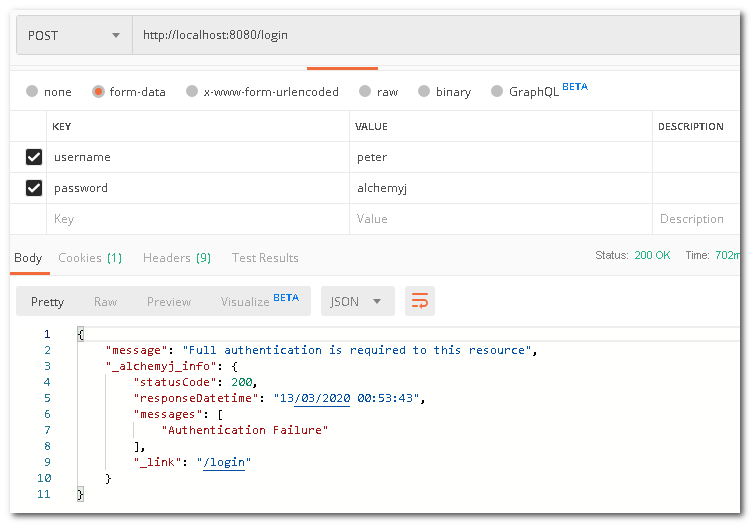
If we change the state of peter from 0(normal) to 1(expired) and log in again, peter will not be able to log in as his user status is expired.
Example 2 - JWT security
For example 1, we have set up a user password token authentication. In this example, we will modify the setting so that it generates a JSON Web Token and uses it for authentication. This approach is often used in REST API as REST API should be stateless.
- Go to REST API Login Service Worksheet, change User information store type to JSON web token (JWT). This tells AlchemyJ that after the LDAP server has confirmed the user id and password are correct, a JWT token will be generated and returned.
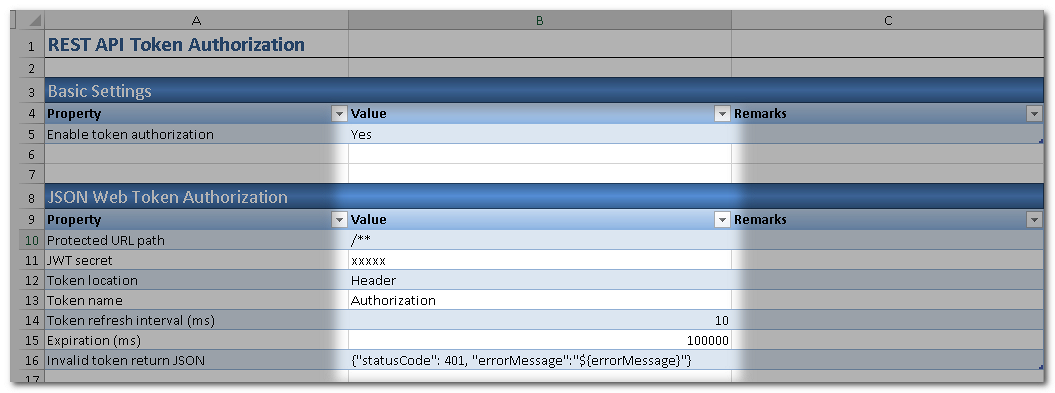
We need to define how our API will validate a JWT token. To do that, add one more worksheet REST API Token Authorization Worksheet. This means our API will look for a JWT in requests and the JWT shall contain a user id.
In the section JSON Web Token Authorization, specify the JWT secret which will be used to encrypt and decrypt JWT tokens.
- Re-build and run the project.
Call the sayHello API before log-in. The request will be denied.
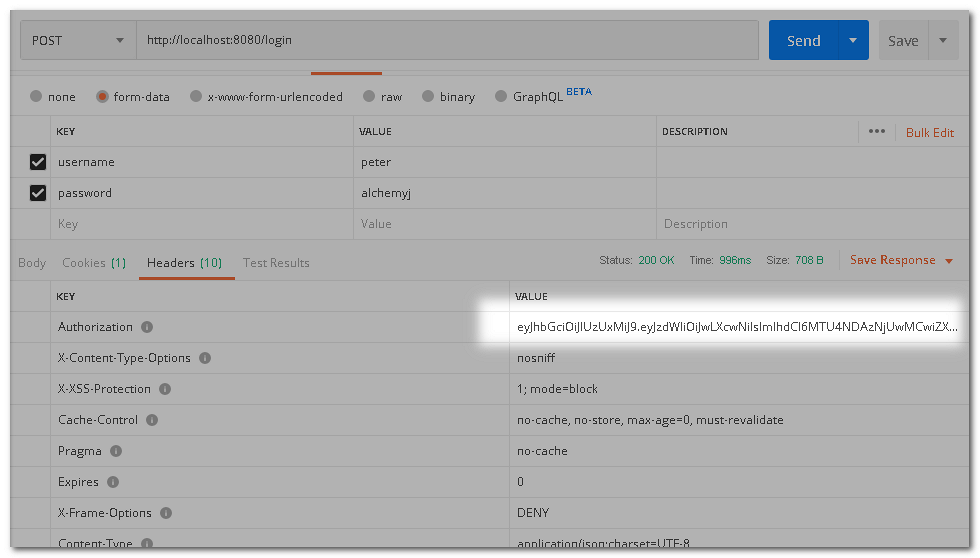
Next, log in by calling the login endpoint. You will find that there is a JWT token in the response headers. The key is the Authorization value. Please copy the token for the coming request.
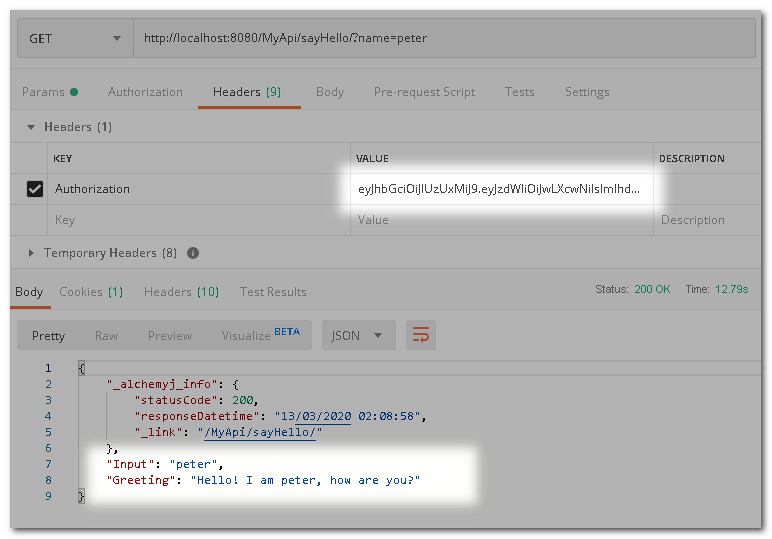
Try to access the sayHello endpoint again by including the received JWT in header Authorization and the request should be granted. Please note that the expiration time of the JWT token is 100 seconds by default. You should send the request before that. You can change the Expiration time to the desired value.
